Cosmetic dentistry has expanded beyond traditional treatments like whitening, veneers, and orthodontics. One of the most exciting and fashionable trends today is the tooth gem. These small decorative jewels bring sparkle to a smile without requiring permanent alterations to the teeth.
Tooth gems are now a mainstream choice among celebrities, influencers, and style-conscious individuals worldwide. But before you commit to adding this sparkling accessory, it’s important to understand how the application process works. This guide provides a clear, step-by-step explanation of the procedure, along with tips for safety, aftercare, and long-term maintenance.
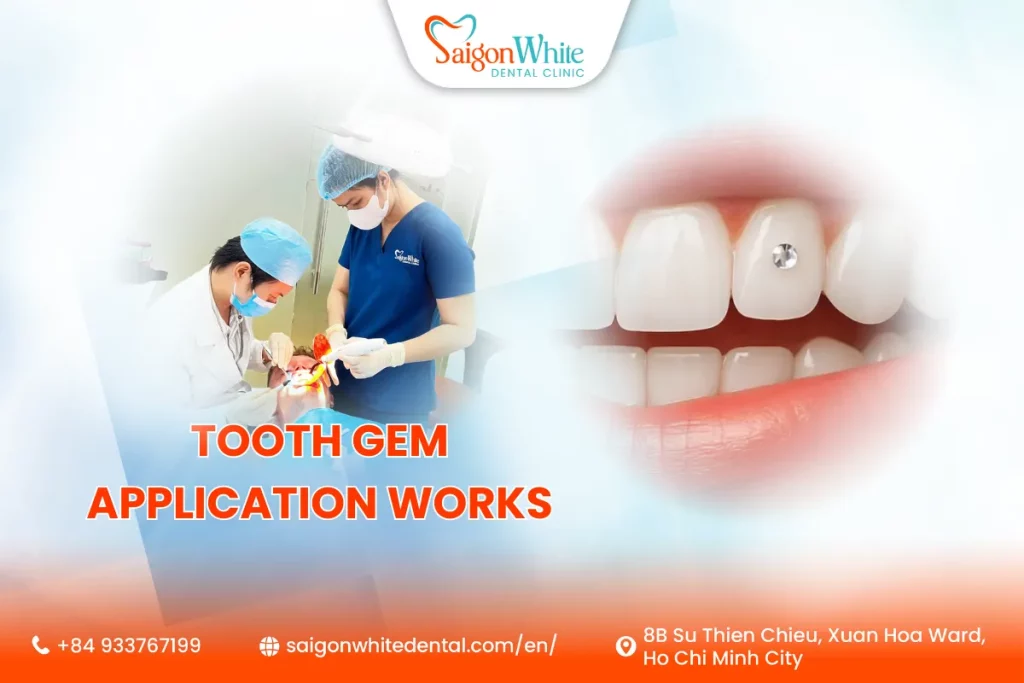
What Is Tooth Gem Application?
Tooth gem application is a non-invasive cosmetic procedure where a tiny jewel—such as a crystal, diamond, or gold stud—is bonded onto the surface of a tooth using a dental adhesive. Unlike crowns or veneers, the enamel is not drilled, shaved, or altered.
Key points:
- Painless: No anesthesia or needles required.
- Temporary: Gems can last from several months to two years.
- Safe: When performed by a professional, the enamel remains intact.
This makes tooth gem application a safe and fun way to experiment with style.
Preparing for the Procedure
Dental Consultation
Before applying a gem, a dentist will check the overall health of your teeth and gums. People with cavities, gum disease, or weakened enamel may need treatment first.
Choosing the Gem
You’ll select the type, size, and design of the gem. Options include:
- Swarovski crystals (affordable, colorful)
- Diamonds or lab-grown diamonds (luxury, brilliant)
- Gold or silver studs (subtle shine)
- Custom shapes (hearts, stars, initials)
Cleaning the Tooth
The tooth receiving the gem is polished to remove plaque or stains. A clean surface ensures better bonding.
Step-by-Step Guide to Tooth Gem Application
The procedure is straightforward and usually takes 10–20 minutes. Here’s the process in detail:
Step 1: Cleaning the Tooth
The dentist begins by polishing the tooth surface. Any plaque or debris is removed. This step is essential because bonding agents will not adhere properly to dirty or stained enamel.
Step 2: Isolating and Drying
The tooth is dried and kept isolated from saliva using cotton rolls or cheek retractors. Moisture can weaken the bond between the enamel and adhesive, so this step is crucial for success.
Step 3: Etching the Enamel
A mild acidic gel (etching gel) is applied to the tooth surface for a few seconds. This creates microscopic roughness on the enamel, allowing the adhesive to grip securely. The gel is then rinsed off, and the tooth is dried again.
Step 4: Applying Bonding Agent
A thin layer of dental bonding resin is brushed onto the etched area. This material is similar to the adhesive used for orthodontic brackets, safe for enamel, and fully reversible.
Step 5: Placing the Gem
The chosen gem is carefully placed onto the adhesive using a small applicator tool. Precision is key—positioning must be perfect for both comfort and aesthetics.
Step 6: Light Curing
A blue LED curing light is used for 20–60 seconds to harden the adhesive. This process secures the gem firmly onto the tooth surface.
Step 7: Final Polishing and Check
The dentist checks the placement, stability, and comfort of the gem. Any excess adhesive is polished away. You’ll be asked to move your lips and tongue to ensure the gem feels smooth and comfortable.
Time Required for the Procedure
- Duration: Typically 10–20 minutes.
- Comfort: Completely painless—no needles, no drilling.
- After the procedure, you can return immediately to eating, drinking, and smiling.
Professional Application vs DIY Kits
Professional Application
- Uses dental-grade adhesives that are safe for enamel.
- Ensures proper placement, hygiene, and durability.
- Lasts longer (up to 1–2 years with care).
DIY Kits
- Often use nail glue or craft adhesives, which can be toxic or damaging.
- Higher risk of enamel erosion, gum irritation, and infection.
- Gems applied at home tend to fall off quickly.
⚠️ For safety and long-lasting results, always choose a professional application.
Aftercare Instructions
Proper care extends the lifespan of your gem and keeps your teeth healthy:
- Oral hygiene: Brush and floss daily, paying extra attention around the gums.
- Food choices: Avoid sticky foods (caramel, gum) and very hard foods (ice, candy).
- Hands off: Don’t pick or pull at the gem—it may damage enamel.
- Dental check-ups: Visit your dentist regularly to ensure the gem isn’t affecting oral health.
Following these guidelines helps maintain both the sparkle of the gem and the health of your smile.
Safety and Comfort
Is It Safe?
Yes. Since the procedure does not involve drilling or altering enamel, it is considered safe. The adhesive used is dental-grade, non-toxic, and removable.
Is It Painful?
No. The tooth gem application is painless. Some people report a slight awareness of the gem for a few days, but this quickly fades.
Can It Be Removed?
Yes. A dentist can remove the gem easily by polishing off the adhesive, leaving the enamel smooth and intact.